I started off by taking photos using a camera and tripod with a green screen for the background as that would make it easier to edit out the background of my models later.
I imported this photo into Photoshop after deciding between two other photos, however I believe that this photo is the most suitable for a rock magazine front cover.
I began editing the photo by using the Quick Selection Tool. This allowed me to easily specifically select my models. By using the green screen, the job of only selecting my models was very simple.
I then used the Masks tool as well as inverting the mask in order to remove most of the green screen in the background.
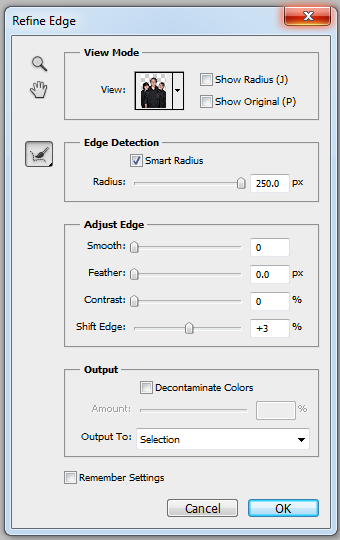
Next, I used the Refine Edge function as well as the Smart Radius function in order to delete even more of the green. The green on the image was a problem as my model's hair was very thin, yet noticeable if I deleted these strands of hair from the model as shown below:
I've decided to go ahead and use the Blur Tool and the Smudge tool in order to attempt to get rid of some of the green.
I used those two tools, as well as the Eyedropper Tool and the Brush Tool in order to change some of the green into hair as simply erasing some of the hair was not an option.


No comments:
Post a Comment